Followers

Showing posts with label Lindys stamp Gang. Show all posts

Tuesday, 31 May 2016

Altered box with 2Crafty chippies

Hello friends!
I have this box that I altered for 2Crafty chipboard as a part of my May DT inspiration. 
It was a mobile box and I decided to alter it to make my own trinket box. :)

I really loved the outcome and I will encourage you to try this as well.
 I love recycling stuff and putting them to better use.
And just to let you know ..if you wondering what that gorgeous blue colour is..its no paint..its LSG spray! 
Have a look


Some close ups-


I painted my chippies in shades of gold,plum,blue etc and then outlined them using 
white gel pen. I also stamped on them using archival ink.

Lots of art ingredients used here as well...microbeads, gold glitter, fine glitter etc.
The background has been made using stencil,threads,laces etc.


I have used the following 2Crafty chippies -

Frame round Ornate
Handdrawn feathers
Turkish lattice panel


Entering this to-Stamplorations challenge


Hope you like it.

Wednesday, 25 May 2016

"Smile" - Mixed Media layout

Hello everyone!

I have a new layout to share with you all today. I made this for my DT work for 2Crafty chipboard.


For this project I used some soft and pastel colors .


Some close ups-


The chipboard is given a coat of white acrylic paint and then I gave some splatters of colors.
 After drying them with heat gun,I used some ink and stamped using script stamp.


The Bubble Reed background chipboard has been cut into parts and used here & there.. 
 
2Crafty Chipboards used-

Bubbly Reed panel
Card circles set 1
ATC Tiny Hearts and stars
Birdhouse


The sprays used here are all from Lindy's stamp Gang


Entering this to the Lindy's Stamp Gang May colour challenge


Hope you like it:)
 Have a great day!

Thursday, 28 January 2016

"On This Day"- Mixed media layout.


 Hello Friends! 

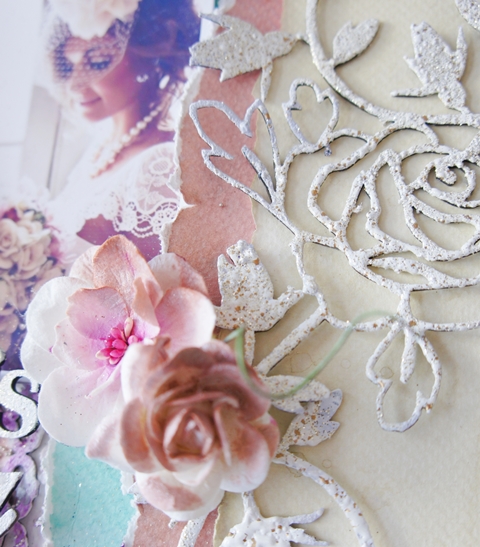
Today I have this soft bridal page to share with you all.
 I made his using the gorgeous 2Crafty Chipboards and the Lindys stamp gang sprays
Have a look

And some close ups-


I used the following Lindys stamp gang sprays-


Entering this to the following challenges-


Hope you like it :)
Have a great day!


Wednesday, 23 September 2015

'Reach Out To Your Dreams' - Mixed media canvas with a Video tutorial.

Hello friends!

Today I have a mixed media canvas to share with you all. I also have a video tutorial  for this.


I used one of my most favourite stamps of the Painted flowers from Altenew Stamps. 
Aren't they the most gorgeous? I embossed these with white embossing powder on vellum and painted these with Lindy's sprays.

Here is the link to the video tutorial


I am entering this to the following challenge-

Lindy's stamp gang- September colour challenge


I have used the following spray colours-


Hope you like it
Have a great day!


Saturday, 5 September 2015

Easy Mixed media card with tutorial!

I have some easy mixed media cards to share with you all. 
Its pretty easy to execute these and so I thought its worth a share since mixed media can be so overwhelming at times!
Not too much embellishing and really fun to make. 
Have a look!


Tutorial


Step 1-

Take the desired stencil and spray through it on your cardstock in any two colours. Gently lift the stencil


Step 2-


 Now reverse the stencil and press on another cardstock for the negative impression of the stencil


Step 3-


You will end up with two patterns like so. 
Add the contrasting layer to the back of these cardstocks.


Step 4-


 On any one of the prepared background spray gently in the centre and spread the mist.


Step 5- 

Heat dry both cardstocks. Take the second stencil you want to use and apply modelling paste or Prima heavy white gesso through it. Prima gesso has heavy consistency and you may use it if careful enough.


Step 6-


 Heat dry again using the rangers heat it tool. Now use double sided  foam tape on the back side and adhere these to your card blanks,


Step 7-


 Embellish these cards as you desire . Also add the sentiment to it.


Step 8- 

Splatter with gesso and mist. 


You are done!


A few more clicks-


Supplies Used-

Lindys stamp gang sprays- Flat fabio- Mango mania
Lindys stamp gang sprays Starburst spray-Yellow rose of Texas
Lindys stamp gang sprays- Starburst spray- Rusty lantern lime
Tim holtz collection stencil- Doily
Crafters workshop stencil- Specimens
7Dots studio stickers
Double sided foam tape
Prima heavy white gesso
Palette knife
Mulberry flowers and leaves

Entering this to the following challenges-

Thursday, 23 April 2015

Mixed media tags with a tutorial

 Hello friends!
 I have started off again with blogging regularly so you are going to see me here often :) 
Today I have two mixed media tags to show you all I created this as the DT project for Crafters corner blog. 
I  have also shared a pictorial tutorial there so please hop over and leave a comment if you like it. 

Here are a few pics.. 


 My Lindys sprays always come in handy with any mixed media project. God! I love them sooo much :)


 Love those Prima embellishments <3


Here is a pictorial tutorial  for the same-

Step1:


 I used some scrap cardstock paper that I had randomly misted/sprayed using Lindys stamp gang sprays. I had a big sheet that was spoiled as I spilled a lot of my mist of it.Then it became my testing sheet for mists and finally I decided to make it my base for tags. 
 Isn't that a great way to reuse what you always thought as scrap? I simply loved using this as my base. More so as I could make use of something that was totally a waste. You can use almost any colours of sprays you wish to.

I cut this sheet into 4 rectangular tag shapes using my We R memory Keepers trim and score board. This is a trimmer cum score board in one and is a good buy if you are looking for something affordable and compact as it it is a two in one at the cost of one equipment and is fold-able at the same time thus saving storage space.


Step 2:


 I distressed the edges of the tags using the Prima comfort craft distressing tool. I just love using this tool for giving distressed edges to my paper. This is so versatile you will sure fall in love with this tool. It is by far my most favourite purchase of all times in tools!


 Step 3:


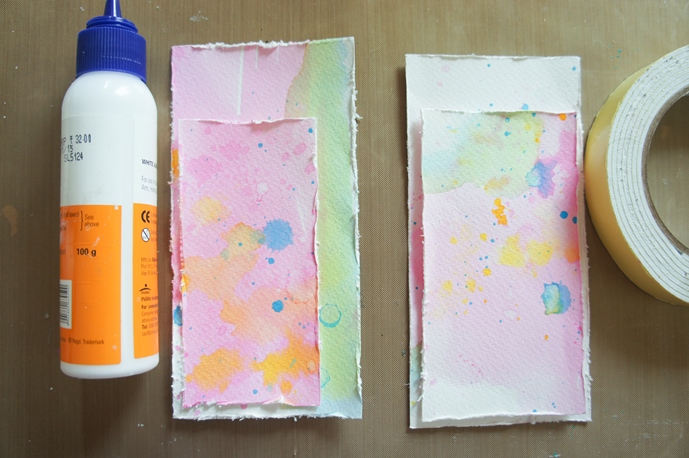
I stacked the smaller tag shape on the lager one and did this with both the sets . One of them I glued down with white glue easily available in the market. You may use the Aleene's tacky glue which have really great reviews.  and the second one I used the double sided foam tape. It is one of the best ways to give dimension.


Step 4:


I did some stamping on the tags using some black archival ink and Kaisercraft dictionary meanings stamp.


Step 5:


Added some modelling/texture paste with Crafters workshop microbial stencil and spatula.


 Step 6:


 Heat dry with Rangers heat it tool


Step 7:


Added some mist on the stencilled area again . I chose Sweet violet purple teal starburst spray from Lindy's stamp gang. Any colour spray can be used here.


Step 8:


I looked at how I wanted my embellishments to go. 


Step 9:


 Finally start adhering the embellishments. I have used quite a few Prima embellishments and flowers you see here.
Prima wood embellishments- Leaves and mushrooms
Prima Typo bulbs 
Prima small typo bulbs
Prima bird houses
Mulberry flowers- Poppy flower
                            Micro roses
                         Rose buds
                             Curved roses


 Step 10:


 Fussy cut some gorgeous butterflies from the Pion design paper- Paris flea market- Postcards using my Tonic scissors. Another of my HOT FAVOURITE tools! 
I then adhered them on the tag using white glue.


Step 11:


Once my butterflies where in place I applied some diamond dust and
  Prima art ingredient- Granite Mica flakes randomly to give some interest to the composition. Also added a few rhinestones here and there.


Step 12:


 I punched a hole on the top centre portion of the tag using the We r memory keepers crop a dile punch and misted some seam binding ribbon using the Lindy's sparys using the Yellow Rose of Texas and Hottie patoite Hot pink starburst spray and Mowed lawn distress ink.
Next was just pulling the ribbon through the punched hole and tying the knot. 


Supplies used-

We R memory Keepers trim and score board
Lindys stamp gang sprays
Prima comfort craft distressing tool
Double sided foam tape
Black archival ink
Kaisercraft dictionary meanings stamp.
modelling/texture paste 
Crafters workshop microbial stencil
spatula
Rangers heat it tool.
Prima wood embellishments- Leaves and mushrooms
Prima Typo bulbs 
Prima small typo bulbs
Prima bird houses
Mulberry flowers-
Pion design paper- Paris flea market- Postcards 
Tonic scissors
Diamond dust
Prima art ingredient- Granite Mica flakes
We r memory keepers crop a dile punch
Lindys stamp gang sprays-   Yellow Rose of Texas
                                               Hottie patoite Hot pink starburst
                                               Cotton candy pink
                                               Sweet violet purple teal
                                               Rusty lantern lime
                                               Cathedral Pines Green
                                               Bachelor button blue
Mowed lawn distress ink


Lindys sprays used

Bachelor button blue

I am also entering it to the Prima Product pick.
 I chose to go with yellow,cream,green,light pink raspberry and blue.. ;) yup all of them.. :)
Prima products used-
Prima small typo bulbs
Prima resin embellishment-birdhouse
Prima typo bulb- large
Prima wood embellishments- leaves and mushrooms
Prima stencil- bubbles
Prima art ingredient- mica flakes
Prima art basics modeling paste opaque white
Prima art ingredient - glass beads crystal
Prima heavy gesso- black for splatters


Hope you like it. Please let me know through your comments.
Have a great crafty week!
Hugs
Jaya